Monday, 22 February 2010

Planning Preliminary Match Cut Exercise.

For our Match Cut exercise we were given a story board and another piece of paper which told us what we need to include.
For this exercise we need to include
  • A match cut
  • Dialogue
  • Shot reverse shot

Our plan was to have one character walk down the corridor into a room and the match cut will show her entering the room.

We then planned to have another character sitting in the room and the characters to end up sitting opposite eachover. They would then start to talk which will be the use of dialogue and we will show this using a shot reverse shot.

Final Edit Of Livetype and Sound Filming Practice


The Bag Swap

To get used to using the camera and prepare us for our Thriller Opening Sequence, we did an excersice in class called "The bag swap."For this excersice we had to plan and film a short video of 2 people swapping bags. In class we created a story board to prepare us for this task and to make our filming schedule clear to us all. We shared the task of drawing the pictures and planning the shot between the 3 of us and all had an equal input. We decided that Josh would be in charge of the camera and me and T'sharna would be in the shots. Our location was college because of the time we had and because we thought that the use of the college lift would be a good way to catch the "Bag Swap."

Whilst filming, we included techniques such as; handheld camera, elipsis, tracking... We also used zoom, wich we realised does not look good on a moving shot.


Once we filmed our shots (this took 1hour), we went back to the classroom and used Final Cut Pro, to edit our shots into a sequence. We all worked togever closely for this task as it was our first experience of editing so we all wanted to get the practice in. Once we edited the shot into the sequence we wanted, we used Livetype to import the title into the sequence. We also used the programme Sound to import the music we felt matched the sequence.

Skills audit: Livetype and Sound


For our Skills audit we learnt how to use the two programmes Livetype and Sound.


Livetype is a programme which allows you to create texts and then edit it including;
background
colour
styles (etc)
This image can then be improted into the edits on final cut pro. This would usually be used for the title of the sequence, or for credits and other possible reasons.

Sound is a programme which has loads of different music, that you can play and imerge with other sounds. It allows you to create different feelings and make the music your own. When imported onto final cut pro, it adds effect to the sequence.

Thursday, 18 February 2010

Intoduction to cameras & health and safety tutorial

In this lesson, in our groups we were given a tutorial of how to use the cam- corders and tripods. This excercise was to familiarise us with the equiptment so that we could use it properly.

We learnt how to set up the tripod and how to change the height and angle of shots using this tool. We also learnt what the buttons on the camera meant, aswell as learning how to focus the camera, insert our memory cards correctly, and other simple rules e.g. do not zoom whilst shooting.

After this tutorial we had the draw up a Story Board of a short sequence we were going to create called "The bag swap." The story board allowed us to discuss the shots we were going to use, and allowed us to have a cleared idea of what out final edit would look like. We only had 45minutes to film our shots so we decided to stay on site for this excercise.

Friday, 12 February 2010

How Is Suspence Created In Collateral?

Suspense in Collateral.

In Collateral the opening sequence of this film starts with an establishing shot of Tom Cruise, we then see another establishing shot of Jason Stathan. These establishing shots introduce the main characters to the audience.

The characters are in a place that is very crowed, with many people, this makes it suspicous as we as an audience don't know why their there. Although they are in a crowed place the people in the back ground and blurred out; this makes it clear to the audience that those two characters are the main focus. We then see a shot reverse shot between both characters , this carries connotations to the audience that there may be a link between them or the some how know eachother.

A medium shot of cruise and stanthan is shown, they then bump into each other and drop their bags. Both men are dressed in black suits and one in dark sunglasses which can be seen as suspicious as it may be thought to the audience that they are some kind of bad bussiness men, it would also make the audience think 'why is he wearing sunglasses?' or 'maybe he doesn't want people to see his eyes... but why?' The fact that both characters spoke to each other even though they are strangers to eachother is a bit weird they then pick up the bags but only they've swapped and they both knew that they had, which suggests to the audience that they may be associates.

The non diegetic sounds of footsteps and the diegetic accompaninment that stops and starts creates tension and gets the audience to wonder whats going to happen next.

Final Cut Pro; Bait Tutorial

Bait Tutorial

To be able to make an opening sequence for our Thriller Opening Sequence you have to be able to use Final Cut Pro. Our class had a bait tutorial which teaches us how to do skills on the apple mac computers.

When final cut pro is opened there are four different sections; the timeline, the files, the canvas and the viewer . All of the shots are located in the canvas in the top left of the screen. The timeline is where you create your final piece of work. To drag a shot into the timeline you have to select the part of the shot you want to do this, you need to decide where your in and out points are, for this you have to press 'i' from where you want it to start and 'o' from when you want it to end.

We learnt how to make match cuts for example we used a man taking a boys food then, it cuts from the boy with the food in his hand, then back to the man.

we also learnt how to close gaps quickly without having to move each one seperately to save time. To do this you have to press 'ctrl' and click on the mouse then click on 'close gap'. To put effects on to a clip, for example to add a dissolve you have to click in between the two shots, go to 'effects' then 'video transitions' then go to 'dissolve' then add the type of dissolve that you want.

Thursday, 11 February 2010

Final edit of Livetype and Sound Practice

The Bag Swap

To get used to using the camera and prepare us for our Thriller Opening Sequence, we did an excersice in class called "The bag swap."


For this excersice we had to plan and film a short video of 2 people swapping bags.


Once we filmed our shots (this took 1hour), we went back to the classroom and used Final Cut Pro, to edit our shots into a sequence. We also used Livetype and Sound to finish off our sequence to the standards we required it to be.

Wednesday, 3 February 2010

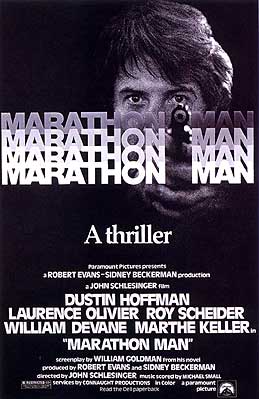
How Suspense Is Caused In "Marathon Man"


Marathon man is a 1976 thriller based on the novel of the same name by William Goldman. The films stars Dustin Hoffman as the protagonist , Thomas "Babe" Levy, Roy Scheider as his brother, an undercover agent, and Laurence Oliver as Nazi dentist and war criminal, Dr. Christian Szell.
Through out the film there are countless times when suspense has been built up in a number of different ways. A first example of how suspense is caused is near the beginning of the film, when the car chase between the two old men is taking place.

Monday, 1 February 2010

Technical ordit or Bait Tutorial


Bait Tutorial

In order to create an opening sequence that looks proffesional, our class had a Bait Tutorial, which teaches us certain skills in editing on an apple mac.

There are 4 different sections on the screen; the Timeline, Canvas, Viewer and the files.When editing using Bait, all unedited shots are in the Canvas. To select a section of that shot which u would like to use; u select it by pressing "I" at the beggining of the shot, and pressing "O" at the end of the shot. You then drag your selection down to the Timelie. Any shots that are selcted and brought down to the Timeline can be watched in the Viewer.

On our tutorial we learnt how to use match cuts. The example that we used was of a man walking into a cafe and grabbing food from a plate. We cut from his body, to his hand, then back to his body. Match cuts make the shot change look natural and they have to be accurate for them to work.

There is a tool on Bait called Razor Blade. This tool allows u to select sections quickly and delete them with a click. It is easy and fast so that no time is wasted. It is found on the toolbar on the right of the screen.

If there are any gaps inbetween clips on the timeline, to get rid of them quickly and perfectly, click in the gap and press CTRL at the same time to close the space.

To edit shots so that they dissolve into eachover, click on the end of the shot and press CTRL and "T" on the keyboard and the effect will be added. However if there isnt sufficient space on the IN and OUT points the effect will not work and an error bar will appear.

To include music in your clip, select the music you want, using "I" and "O" for the IN and OUT points, select the hand at the top of the bar and drag it onto the Timeline underneath the clips.